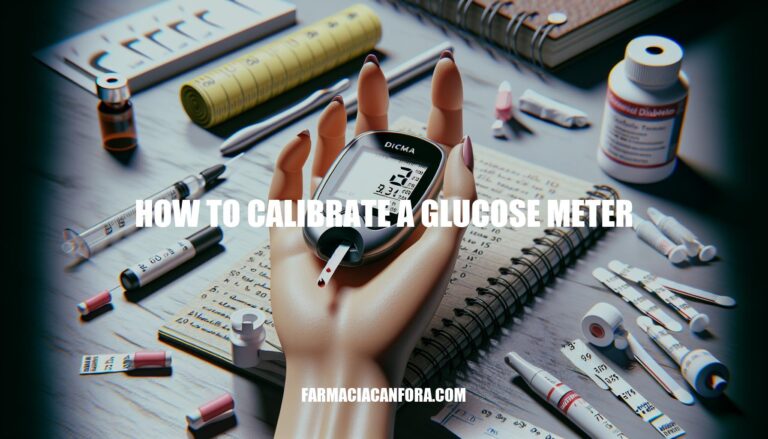
Calibrating a glucose meter is crucial for ensuring accurate blood sugar readings. Accurate readings are essential for effective diabetes management, helping individuals make informed decisions about their diet, medication, and lifestyle. Regular calibration helps maintain the reliability of the device, reducing the risk of incorrect readings that could lead to improper treatment or health complications.
Understanding Calibration
Calibration is the process of ensuring that a glucose meter provides accurate readings by comparing its measurements to a known standard. This is crucial because accurate blood sugar readings are essential for managing diabetes effectively. Incorrect readings can lead to improper insulin dosing or dietary decisions, which can have serious health consequences.
Preparation Steps
- Gather Supplies: Ensure you have your glucose meter, test strips, control solutions, and a clean, dry surface.
- Check Expiration Dates: Verify that the test strips and control solutions are not expired. Using expired items can lead to inaccurate readings.
- Wash Hands: Clean your hands thoroughly to avoid contaminating the test strips or control solutions.
- Insert Test Strip: Place a new test strip into the glucose meter. The meter should turn on automatically.
- Shake Control Solution: Shake the control solution bottle well before use.
- Apply Control Solution: Dispense a drop of control solution onto a clean surface, then touch the edge of the test strip to the drop.
- Wait for Reading: Allow the meter to process the control solution and display a reading.
- Compare Results: Check the reading against the range provided on the test strip vial. If the reading falls within the range, the meter is calibrated correctly.
- Repeat if Necessary: If the reading is outside the range, repeat the process with a new test strip and control solution.
Following these steps ensures your glucose meter is accurately calibrated and ready for use.
Step-by-Step Calibration Process
Here are the specific steps to calibrate a glucose meter:
- Turn on the meter: Insert a test strip to power it on.
- Insert the test strip: Push it in as far as it will go without bending.
- Apply the control solution: Place a drop of control solution on the test strip.
- Wait for the reading: The meter will display a result.
- Compare the result: Check if the reading matches the range on the control solution bottle.
If the reading is within the specified range, your meter is calibrated correctly.
Troubleshooting Calibration Issues
Here are some common problems during glucose meter calibration and their solutions:
-
Error Messages:
- Problem: Meter displays an error message.
- Solution: Check the user manual for specific error codes. Ensure the test strip is properly inserted and compatible with your meter. Replace batteries if needed and use the monitor at room temperature.
-
Inaccurate Readings:
- Problem: Readings seem unusually high or low.
- Solution: Wash hands thoroughly before testing. Check expiry dates on test strips and control solutions. Store test strips in a cool, dry place. Follow the manufacturer’s instructions for calibration.
-
Insufficient Blood Sample:
- Problem: The meter indicates an insufficient blood sample.
- Solution: Warm your hands to increase blood flow. Ensure the lancing device is set to an appropriate depth.
-
Test Strip Issues:
- Problem: Damaged or outdated test strips.
- Solution: Use strips that are in good condition and meant for your specific glucose meter. Store them properly to avoid moisture and humidity.
-
Environmental Factors:
- Problem: Extreme temperatures affecting readings.
- Solution: Keep your glucose meter and test strips at room temperature.
-
Monitor Problems:
- Problem: Issues with the monitor itself.
- Solution: Fully insert the test strip into the monitor. Replace batteries as needed and consider replacing the monitor every 4 to 5 years.
If you encounter persistent issues, consulting the user manual or reaching out to customer support can be very helpful.
Maintaining Calibration Accuracy
Here are some tips to maintain the accuracy of your glucose meter’s calibration over time:
- Use fresh test strips: Always use test strips that are within their expiration date and store them in their original container to avoid moisture and contamination.
- Keep the meter clean: Regularly clean your glucose meter according to the manufacturer’s instructions.
- Perform control tests: Use control solutions to check the accuracy of your meter periodically, especially when you open a new container of test strips.
- Calibrate as needed: Follow the manufacturer’s guidelines for calibrating your meter, especially when using a new batch of test strips.
- Store properly: Keep your meter and test strips at room temperature, avoiding extreme temperatures.
- Replace batteries: Ensure your meter has fresh batteries and replace them as needed.
- Use sufficient blood: Apply a generous drop of blood to the test strip and avoid adding more blood after the first drop.
These steps will help ensure your glucose meter provides accurate readings over time.
Calibrating a Glucose Meter: A Crucial Step for Accurate Blood Sugar Readings
Calibrating a glucose meter is crucial for accurate blood sugar readings, which are essential for effective diabetes management. To ensure accuracy, follow these steps:
- Gather supplies.
- Check expiration dates of test strips and control solutions.
- Wash your hands thoroughly before testing.
- Insert a new test strip into the meter.
- Shake the control solution well before use.
- Apply the control solution to the test strip.
- Wait for the reading to appear on the meter’s display.
- Compare the result with the expected range.
If the reading is outside the acceptable range, repeat the process using a new test strip and control solution. Regular calibration helps maintain device reliability, reducing incorrect readings that can lead to improper treatment or health complications.
Maintaining Device Reliability
- Use fresh test strips for each use.
- Keep the meter clean and free of debris.
- Perform control tests regularly to ensure accuracy.
- Calibrate as needed, following the manufacturer’s instructions.
- Store the meter properly when not in use.
- Replace batteries according to the manufacturer’s schedule.
- Use sufficient blood for each test to ensure accurate readings over time.